Hi Everyone,
Have you seen the new release of Craftreat? No??? Then you should go and check out the whole collection. There's a lot of Floral stencils which are apt for any occasion projects and some really awesome Diwali themed stencils, paper pack and decoupage papers. Today, I shall give me a glimpse of the Diwali themed release.
With Diwali around the corner, apart from cleaning the house, the task is of decorating it as well. The festival brings with it bright colours and a lot of shine and shimmer and that's exactly what am going to show in my projects.
Project 1:
The first thing that the guests see when they arrive during the festival is the door, and a small signboard wishing them even before you have received them personally brings a good vibe. So here is a quick signboard with the Craftreat Diwali Stencil.
The frame is handmade with Elizabeth Crafts frame die and Craftreat double sided Shimmer Cardstock. I have then used a white cardstock on which with the help of stencil and coloured inks, I have dabbed the sentiment 'Happy Diwali'
One can use it like a card too and send it along with your Diwali gifts!
Projects 2a and 2b:
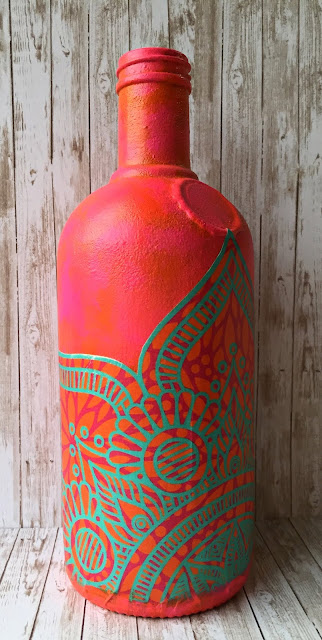
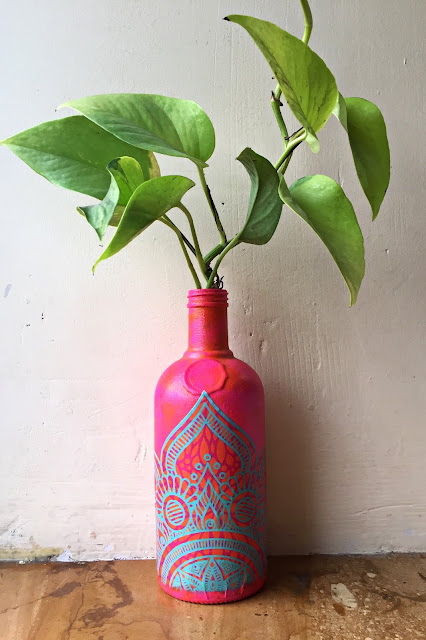
The easiest and simplest decor apart from festive cushion covers and bedsheets is to add some really bright elements to your house. One of the quickest way is decorating it with bottles. They are easily available and dont occupy too much space. They are cost effective and can be done by yourself at home. And they can serve not only as just decor but double up as a planter.
Project 2a:
I have used a clean glass bottle and applied two coats of white gesso with atleast 4 hours of drying time between each coat. After they had completely dried up, I have used Folkart Multisurface paints Pink, Orange and Neon Pink (for slight shimmer and brightness) and dabbed it in my desired finish with the help of a sponge. Then I fussy cut the design from the decoupage paper, applied mod podge on the back and stuck it as per my wish. Giving it sometime to dry, I applied one coat of mod podge all over the bottle. Once the mod podge dried up, I have applied two generous coats of varnish with again 4-5 hours of drying time between each coat.
Project 2b:
I have taken another glass bottle and again applied two coats of white gesso allowing drying time between them as stated above, and after the gesso layer dried up I have dabbed Folkart Multisurface paints Yellow and Orange (very minimal).
Side 1:
I have then fussy cut the the two ladies and stuck them as per my wish using mod podge. Using a mandala Craftreat stencil I have dabbed in some neon green and neon pink around them. I have then used a script stencil and dabbed in some black chalk paint.
Side 2:
I have fussy cut the peacock with the frame and stuck it as per my wish using mod podge. I have then used a script stencil and dabbed in some black chalk paint.
I also dabbed in some neon green and neon pink on the neck of the bottle. After allowing enough drying time, I have given the entire bottle two generous coats of Varnish with a good drying time amount as stated above between the layers.
Project 3:
The decor is incomplete without lighting or lamps. So I decided to make my own lamp.Taking a glass bottle, I have used a glass cutter to etch the cutting circle at a distance of my desire. Then using the ice and candle method on the etched cutting circle I have broken/separated the bottle and then to smoothen the rough edges of the glass I have used a hard sanding paper.
After the cutting process, I have wrapped some twine at the bottle neck.
This time instead of white, I have applied two coats of black gesso. Once dry, I have dabbed in Folkart Multisurface paints Neon green and matt green in my desired finished. After the paints had dried up, I have used Gold wax to give it some shine and shimmer. I then fussy cut the borders from the decoupage paper and with the help of mod podge stuck it as per my wish. Allowing some drying time, I have applied two generous coats of varnish with enough drying time between the layers.
This time instead of white, I have applied two coats of black gesso. Once dry, I have dabbed in Folkart Multisurface paints Neon green and matt green in my desired finished. After the paints had dried up, I have used Gold wax to give it some shine and shimmer. I then fussy cut the borders from the decoupage paper and with the help of mod podge stuck it as per my wish. Allowing some drying time, I have applied two generous coats of varnish with enough drying time between the layers.
I hope you like the projects I have share and am sincerely hoping that these inspire you to create your decor for this coming Festive Season!!! Enjoy the process of creating your own customised decor!!!
Happy Crafting
Saumya
Products Used:


No comments:
Post a Comment